

Did you know 78% of people who try homemade pita never go back to store-bought? The taste and texture difference is huge. I’m excited to share a foolproof method for soft, fresh pita bread that will change your meals and snacks.
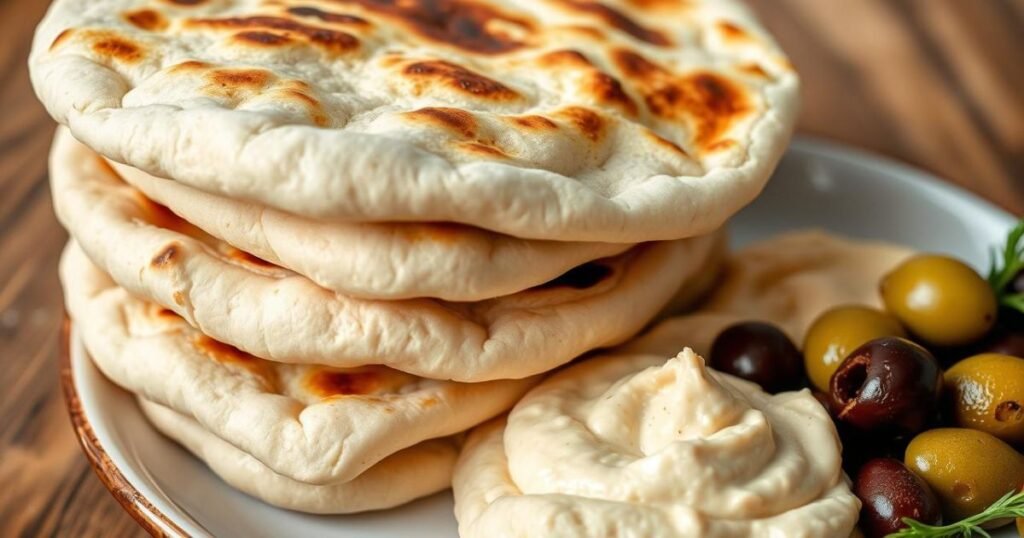
Making your own soft pita at home is not only tastier but also easy. Watching them puff up in the oven is magical. They become perfect pockets for your favorite fillings.
This soft pita bread recipe is special because it uses simple pantry ingredients to create something amazing. The dough comes together fast and only needs a short rest at room temperature before baking.
I’ve tested this method many times to make sure it works for beginners. You’ll be amazed at how these homemade pita rounds beat anything from the store. They have no preservatives or additives.
Ready to enjoy the warm, aromatic joy of freshly baked flatbreads? Let’s explore this wonderful world together!
Why Make Your Own Pita Bread at Home?
Homemade pita bread is more than a recipe. It’s a game-changer that will make you see this ancient food in a new light. The first time you pull out perfectly puffed pitas from your oven, you’ll wonder why you ever settled for store-bought. If you’ve never had fresh pita bread, you’re in for a treat that will change your meals and impress your family.
Making your own pita connects you to a long tradition of bread-making in the Mediterranean and Middle East. It’s deeply satisfying to create these perfect bread pockets using techniques passed down through generations.
Fresher and More Flavorful Than Store-Bought
The difference between homemade and store-bought pita bread is huge. Most supermarket pitas are thin, stale, and tasteless. They’ve been sitting on shelves for days or weeks, losing flavor and texture.
In Israel as a child, I tasted what real pita bread should be like. The local pitas were soft, chewy, and airy—perfect for scooping up hummus or holding falafel. You’ll create this authentic experience with a homemade pita bread recipe.
The aroma alone is worth making it. Your kitchen will fill with the scent of freshly baked bread. The flavor is richer and more satisfying, with a soft, steamy interior.
| Characteristic | Store-Bought Pita | Homemade Pita | Difference |
|---|---|---|---|
| Freshness | Days or weeks old | Fresh from your oven | Dramatically fresher taste and texture |
| Flavor | Bland, often stale | Rich, aromatic, yeasty | Complex flavor profile |
| Texture | Often dry and crumbly | Chewy outside, soft inside | Perfect pocket formation |
| Ingredients | Often contains preservatives | Simple, wholesome ingredients | No unnecessary additives |
Customizable Ingredients and Sizes
One of the best things about making your own pita bread is being able to customize it. With a pita bread recipe easy for beginners, you control what goes into your bread. No preservatives or mystery ingredients—just flour, water, yeast, and salt.
Want to try different flavors? Add herbs like rosemary or za’atar to your dough. For more nutrition, use whole wheat flour or add seeds like flax or sesame. A traditional Lebanese pita bread recipe might include olive oil, while a Greek pita bread recipe often uses yogurt.
Customizing size is another great benefit. Need mini pitas for appetizers? Make them smaller. Want larger sandwich pockets? Make them bigger. You can even adjust the thickness for different textures.
The versatility also applies to cooking methods. While most recipes use the oven, you can also cook pitas on a stovetop griddle or an outdoor grill for a smoky flavor. Each method gives different characteristics, so you can find your favorite pita style.
Essential Ingredients and Tools for Perfect Pita Bread
To make soft, fluffy pita bread with a perfect pocket, focus on quality ingredients and tools. You probably have most of what you need in your pantry. With the right mix of ingredients and tools, your homemade pita can look and taste like it came from a bakery.
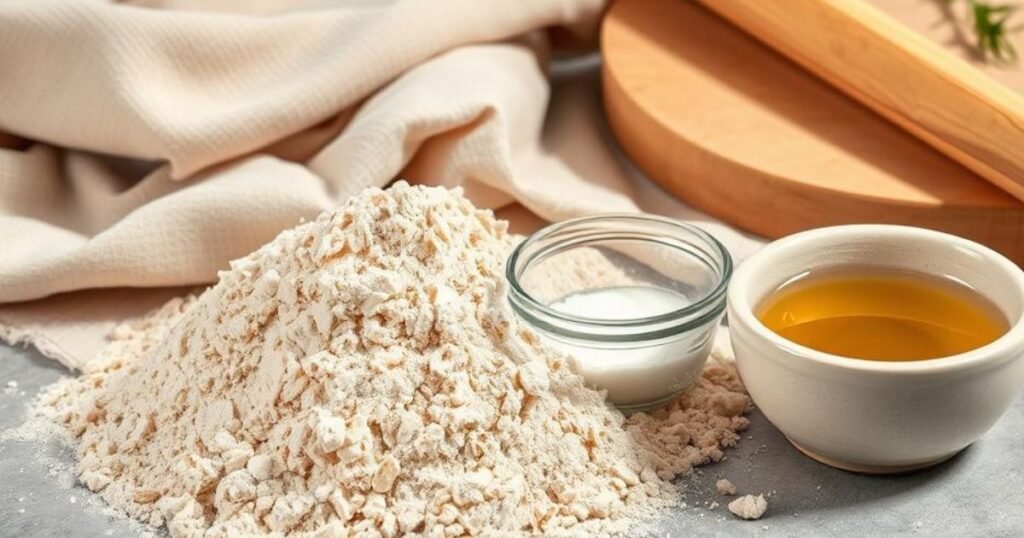
Flour, Yeast, Salt, and Water
The key to great pita bread is the right ingredients. Here’s what you’ll need:
- Flour – I use bread flour for its chewy texture. But all-purpose flour works well too. For a healthier option, mix in some wheat flour.
- Instant yeast – It’s easy to use and reliable. Mix it with warm water and sugar to get it started.
- Sugar – A little sugar makes the yeast work faster. It’s like food for your yeast!
- Salt – Salt adds flavor and helps the yeast. It also strengthens the dough for a better chew.
- Water – Use warm water to activate the yeast. The right temperature is crucial.
Stand Mixer and Pizza Stone for Best Results
Modern tools make making pita easier and more reliable:
- Stand mixer – It’s a game-changer for dough. The dough hook attachment kneads without tiring you. It makes the dough stretchy and elastic, perfect for pita pockets.
- Pizza stone – It’s key for a perfect pocket. A hot pizza stone provides the intense heat needed for a rapid rise. It keeps the heat even.
- Baking sheet alternative – If you don’t have a pizza stone, a heavy baking sheet works. It needs to be preheated to get that initial heat.
- Rolling pin – It helps make even pita rounds. Aim for a thickness of about ¼ inch for the best texture.
The magic of homemade pita bread comes from the right ingredients and tools. The dough needs to hit a very hot surface to create a pocket. This heat turns the dough’s moisture into steam, pushing the layers apart.
With these ingredients and tools, you’re ready to make bakery-quality pita bread at home. It’s surprisingly easy once you understand the science behind it!
Step-by-Step Guide to Making Homemade Pita Bread
Making homemade pita bread is easier than you think. Follow these steps to get soft, fluffy, and perfectly puffed pitas every time.
Activating the Yeast and Preparing the Dough
Start with warm water and yeast. Mix 1 cup of warm water (about 110°F) with 2¼ teaspoons of instant yeast and a teaspoon of sugar in a bowl.
Wait 5-10 minutes for the mixture to foam. If it doesn’t, your yeast might be old or the water too hot. You’ll need to start again.
While waiting, measure 3 cups of flour and 1½ teaspoons of salt into a large bowl. Add the yeast mixture, 2 tablespoons of olive oil, and mix.
Stir until a shaggy dough forms. This is the start of your delicious pita dough.
Kneading, Resting, and Shaping the Pita Rounds
Now, knead the dough! Place it on a lightly floured working surface and knead for 8-10 minutes. The dough should be smooth and elastic.
Using a stand mixer? Kneading takes 5-6 minutes with a dough hook. The dough should feel slightly tacky but not sticky. Add flour if needed, but don’t overdo it.
Put the dough in an oiled bowl, cover with a damp kitchen towel, and let it rise in a warm spot. It should double in size in 1-2 hours.
Punch down the dough to release air bubbles. Divide it into 8 equal dough balls. Use a kitchen scale for even sizes. Let them rest for 15 minutes covered with a towel.
Shape each ball into a circle about ¼-inch thick. Don’t make them too thin. Place them on a lightly floured surface and let them rest for 10 minutes before baking.
Baking Pita Bread in the Oven for Optimal Puffiness
Preheat your oven to 475°F (246°C) with a pizza stone or baking sheet inside. This high heat creates the steam that makes the pocket.
Cut squares of parchment paper for easy transfer. Lightly flour each square and place a pita round on top.
When your oven is ready, bake 1-2 pitas at a time. Slide them onto the hot surface with the parchment paper.
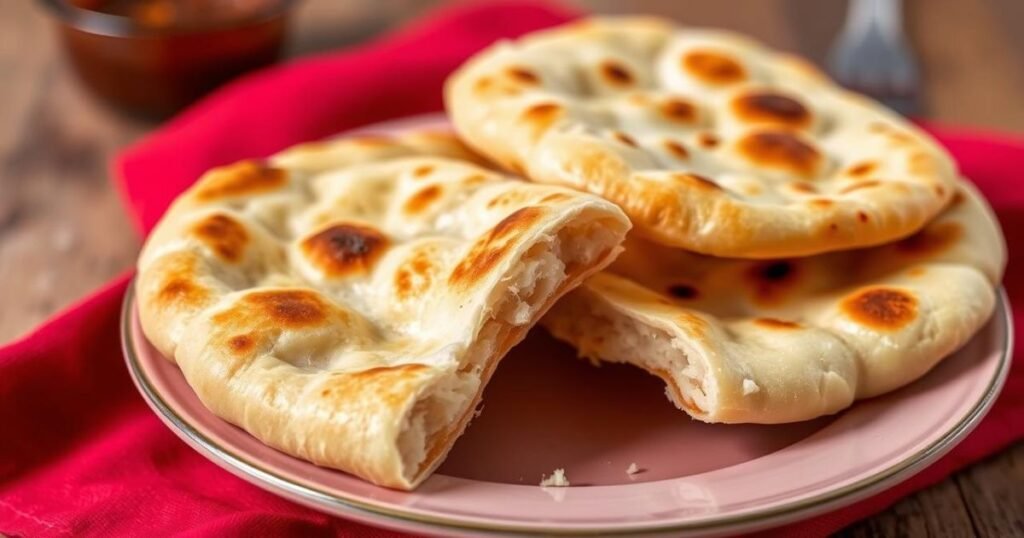
Watch as they puff up in 1-2 minutes! They’ll be fully baked in 3-4 minutes, with light browning around the edges. Don’t overbake.
Remove the pitas and cover them with a clean towel. This keeps them soft as they cool. Continue baking until all pitas are done.
Seeing your dough balloon into perfect pita pockets is satisfying. If some don’t puff fully, they’re still delicious. Use them for flatbreads or torn into pieces for dipping.
Pita Bread Recipe Variations and Serving Suggestions
Homemade pita bread is incredibly versatile. I’ll share my favorite ways to make it even better. Once you learn the basics, you can try many new things.
Delicious Pita Bread Variations
My top pick is a pita bread recipe with yogurt. Adding ¾ cup of Greek yogurt makes the dough incredibly tender. It tastes a bit tangy, like sourdough, but is quicker to make.
This version stays soft and fresh for longer. It’s thicker, softer, and puffier than any other pita I’ve tried.
- Substitute up to 50% whole wheat flour for a nuttier flavor and extra fiber
- Add sesame, flax, or nigella seeds to the dough before the final rise
- Mix in dried herbs like oregano or rosemary for Mediterranean-inspired pita
- Add a tablespoon of olive oil to the dough for a richer texture
Irresistible Pita Bread Fillings
There are endless pita bread fillings to try. I love stuffing it with homemade falafel and tahini sauce. For a quick lunch, try a smashed chickpea salad in a warm pita pocket.
For a kebab pita bread recipe, make the dough thicker. This helps it hold juicy fillings without tearing.
For a fun family dinner, set up a DIY pita bar. Let everyone create their own pita with different fillings. Great options include:
- Grilled chicken, beef, or lamb kebabs
- Roasted vegetables like eggplant, zucchini, and bell peppers
- An array of sauces: tzatziki, hummus, tahini, or garlic yogurt
- Fresh toppings: diced tomatoes, cucumbers, pickled onions, and herbs
Beyond the Pocket: Creative Serving Ideas
Pita bread is great for dipping too. Try it with roasted red pepper hummus, baba ganoush, or homemade labneh.
Turn pita into crispy chips by cutting it into triangles. Brush with olive oil, sprinkle with salt or spices, and toast until golden. These homemade chips are better than store-bought.
Use pita as a pizza base for a quick meal. Top it with sauce, cheese, and your favorite toppings. Kids love these “pita pizzas” for their crispy edges and soft centers.
| Pita Variation | Key Ingredients | Best For | Flavor Profile |
|---|---|---|---|
| Classic Pita | Flour, yeast, salt, water | All-purpose use | Neutral, slightly yeasty |
| Yogurt Pita | Basic dough + Greek yogurt | Stuffed pockets, longer shelf life | Tangy, sourdough-like |
| Whole Wheat Pita | 50% whole wheat flour | Healthier option, hearty fillings | Nutty, earthy |
| Kebab Pita | Thicker dough, sometimes with olive oil | Juicy meat fillings, shawarma | Robust, can handle strong flavors |
| Seeded Pita | Basic dough + seeds (sesame, nigella) | Serving with dips, presentation | Aromatic, textural contrast |
Whether it’s a traditional kebab pita bread recipe or a quick yogurt pita, homemade pita is special. The joy of watching it puff up and the amazing smell in your kitchen is unmatched.
Try these variations and find your favorite way to enjoy pita. Making your own pita will make you never want to go back to store-bought again!
Conclusion: Elevate Your Meals with Homemade Pita Bread
Making your own pita bread adds a special touch to your meals. It’s a bread that connects you to ancient culinary traditions. With just 15 minutes of active work, you can create this unique bread.
Don’t worry if your first batch isn’t perfect! The secret to those magical pockets is a well-heated oven. Make sure it heats for at least 30 minutes before cooking pita for the best results.
Short on time? Try a pita bread recipe without yeast using baking powder instead. It’s great for busy weeknights when you need bread fast. The flavor is a bit different, but it’s still delicious.
Freshly made pita stays good at room temperature for about 2 days. For longer storage, freeze them after cooling. Then, reheat in a toaster or warm oven when you’re ready to enjoy. I often make double batches to always have some on hand.
There’s something truly satisfying about tearing into warm, fluffy pita you’ve made yourself. Whether you stuff it with falafel, use it to scoop up hummus, or turn it into quick pizzas, homemade pita makes even the simplest ingredients special.
So heat your oven, dust your counters with flour, and discover the joy of fresh pita bread in your own kitchen!
FAQ – Pita Bread
Why doesn’t my pita bread puff up properly?
Pita bread not puffing can be due to several reasons. First, make sure your oven is hot enough, preheating to 500°F for 30 minutes. The dough should be about ¼-inch thick. Also, give the dough enough time to rise. Check that your yeast is fresh and active. Quickly place the dough on a hot baking surface, like a pizza stone. This initial heat is key for puffing.
Can I make pita bread without a stand mixer?
Yes, you can make pita bread by hand. Knead the dough for 8-10 minutes until it’s smooth and elastic. It’s ready when it springs back and feels slightly tacky.
How do I store homemade pita bread and how long does it last?
Store fresh pita bread in a sealed bag at room temperature for 2 days. For longer storage, cool it completely and freeze in a single layer. Once frozen, put it in a freezer bag for up to 3 months. To reheat, use a toaster or oven at 350°F wrapped in foil for 5 minutes.
Can I make pita bread without yeast?
Yes, you can make pita without yeast. Use baking powder instead. Mix 3 cups of flour, 1 tablespoon of baking powder, 1 teaspoon of salt, and 1 cup of warm water with 3 tablespoons of olive oil. It won’t be as chewy, but it’s quick.
What’s the best way to reheat pita bread?
To reheat pita bread, lightly sprinkle it with water, wrap it in foil, and bake at 350°F for 5-7 minutes. For a quicker method, dampen a paper towel, wrap the pita, and microwave for 20-30 seconds. You can also toast it briefly in a skillet.
Can I use whole wheat flour for healthier pita bread?
Yes, you can use whole wheat flour for healthier pita. Use up to 50% whole wheat flour. If using 100% whole wheat, add 2-3 tablespoons more water. It will be nuttier and have more fiber, but might not puff as much.
Why is my pita bread too tough or dry?
Tough pita often comes from overworking the dough or adding too much flour. Keep the dough slightly tacky. Avoid adding extra flour. Also, don’t overbake—pita needs only 3-4 minutes in a hot oven. Finally, cover the baked pitas with a towel as they cool to keep them soft.
Can I make pita bread ahead of time for a party?
Yes, you can make pita bread ahead of time. You can make the dough up to 24 hours ahead and refrigerate it. Or, bake the pitas completely, cool, and freeze them for up to 3

Pita Bread Recipe
Ingredients
- 3 cups of flour bread flour or all-purpose
- 2¼ teaspoons instant yeast
- 1 teaspoon sugar
- 1½ teaspoons salt
- 1 cup warm water about 110°F
- 2 tablespoons olive oil
Instructions
- Mix 1 cup of warm water with 2¼ teaspoons instant yeast and 1 teaspoon sugar. Let it sit for 5-10 minutes until foamy.
- In a large bowl, combine 3 cups of flour and 1½ teaspoons salt. Add the yeast mixture and 2 tablespoons olive oil.
- Stir until a shaggy dough forms. Knead the dough on a floured surface for 8-10 minutes until smooth and elastic.
- Place the dough in an oiled bowl, cover with a damp towel, and let it rise in a warm spot for 1-2 hours until doubled in size.
- Punch the dough down, divide it into 8 equal pieces, and shape each into a ball. Let them rest for 15 minutes.
- Roll each ball into a circle about ¼ inch thick. Let them rest for 10 minutes.
- Preheat your oven to 475°F (246°C) with a pizza stone or baking sheet inside.
- Place pitas on parchment paper and bake for 3-4 minutes until puffed and lightly browned.
- Remove from the oven, cover with a towel to keep them soft.
Notes
- For better results, use a pizza stone to create the perfect puff.
- You can customize the recipe by adding herbs, whole wheat flour, or seeds for a different flavor.
- Pita bread can be stored at room temperature for up to 2 days or frozen for longer storage.
- If you don’t have a pizza stone, you can use an inverted baking sheet or cook on a stovetop griddle.