

Did you know Americans eat over 10 billion doughnuts every year? That’s about 31 doughnuts for each person annually! Yet, many people are hesitant to make doughnuts at home. I’m here to show you how to make foolproof homemade doughnuts that taste like they’re from a bakery.
You don’t need fancy equipment or hard-to-find ingredients to make these soft treats. With basic kitchen items and my easy-to-follow steps, you’ll learn how to make doughnuts with a crispy outside and a fluffy inside.
Are you worried about using yeast or heating oil? Don’t be! I’ve made every step easy so you can succeed. When you take a bite of that warm, freshly glazed doughnut, you’ll see it’s even better than store-bought.
Whether you like them sprinkled with cinnamon sugar, glazed, or filled with jam, this donuts recipe is perfect. Ready to wow your family and friends with the fluffiest, tastiest homemade doughnuts ever? Let’s get started!
Ingredients for Soft and Fluffy Homemade Donuts
Let’s look at the key ingredients for fluffy donuts. The secret to great donuts is in the ingredients, not just how you make them. I’ll show you what you need for the dough and glaze, and why each is important.
Donut Dough Ingredients
Start with the right flour mix. You’ll need 3½ cups of all-purpose flour and ½ cup of bread flour. This mix gives your donuts a light texture and a chewy bite.
For rising, use 2¼ teaspoons of active dry yeast. Bloom it in ¼ cup of warm water with a bit of sugar. When it foams, it’s ready to make your dough rise.
The dough gets sweetness from ⅓ cup of granulated sugar. It also tenderizes the dough. For richness, use 2 large eggs and 1 egg yolk at room temperature. Cold eggs slow down rising, so let them warm up first.
Add ¾ cup of warm milk and 4 tablespoons of melted butter for moisture. These fats make your donuts soft and delicious. Don’t forget 1 teaspoon of vanilla extract for flavor and 1 teaspoon of salt to balance the sweetness.
If you’re watching your diet, there are alternatives. Use almond or oat milk and plant-based butter for dairy-free donuts. For egg-free, try a commercial egg replacer, but the texture might be different.
Glaze Ingredients
A great donut needs a great glaze. For vanilla glaze, use 2 cups of powdered sugar. Sift it first to avoid lumps.
For the right consistency, add ¼ cup of milk or water. I like milk for a creamier glaze, but water works too. Add 1 teaspoon of vanilla extract for flavor, or try other extracts for different tastes.
The glaze recipe is easy to change. For chocolate glaze, add 3 tablespoons of cocoa powder and an extra tablespoon of milk. For maple glaze, use maple extract and syrup. Fruit glazes? Add 1-2 tablespoons of fruit puree or jam.
The glaze’s consistency is key. It should coat the back of a spoon but drip off slowly. Adjust with more powdered sugar to thicken or milk to thin.
Good ingredients make a big difference in your donuts. Spend a bit on vanilla extract and fresh yeast, but regular flour and sugar are fine. With these ingredients, you’re ready to make donuts that are as good as any bakery’s!

Step-by-Step Guide to Making Fluffy Donuts
Turn your kitchen into a donut shop with this guide. It breaks down each step for making bakery-quality donuts at home. The process might seem tough at first, but I’ll guide you through each stage. With patience and attention to detail, you’ll be amazed at what you can achieve!
Preparing the Dough
Begin by mixing warm milk, sugar, and yeast in a large bowl. Let it sit for 5-10 minutes until it foams. This step is key for your donuts to rise right.
If your mixture doesn’t foam, your yeast might be bad. It’s best to start over with fresh yeast.
Next, add eggs, melted butter, vanilla, and salt to the foamy mixture. Stir until everything is well mixed. Then, add flour slowly, mixing after each cup. The dough will pull away from the sides of the bowl when it’s ready to knead.
Turn the dough onto a lightly floured surface and knead for 5-7 minutes. You want a smooth, elastic dough that springs back. To check if it’s ready, try the window pane test. Stretch a small piece of dough thin enough to see light through without tearing.
Dividing and Shaping the Donut Dough
After kneading, put the dough in a greased bowl. Cover it with a clean towel and let it rest for an hour. This rise develops flavor and makes the dough easier to work with.
When the dough has doubled, gently punch it down. Then, roll it out on a floured surface to about ½-inch thickness. Be gentle to avoid deflating the dough.
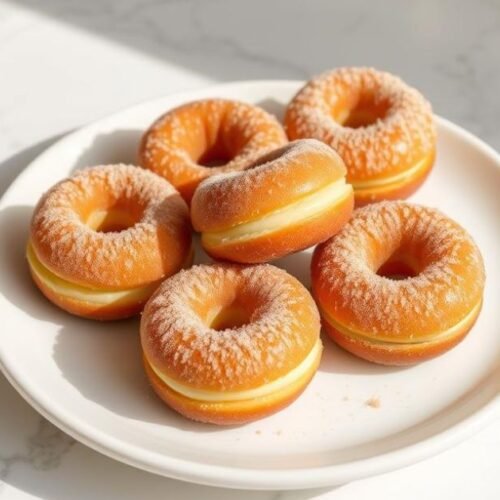
Use a 3-inch round cutter for the outer circle and a 1-inch cutter for the center hole. If you don’t have a donut cutter, use a wide drinking glass and a bottle cap or small shot glass. You can also shape the dough into balls for filled donuts. Aim for pieces that weigh about 2 ounces each. Remember, save your donut holes for delicious treats!
Proofing the Donuts
Proofing is key for a light, airy texture. Place your shaped donuts on parchment-lined baking sheets, leaving about 2 inches between each one. Cover them loosely with plastic wrap or a clean towel.
Let the donuts rise in a warm, draft-free spot for 30-45 minutes. They should double in size and look puffy. To test if they’re ready, gently press a finger into the dough. If it springs back slowly and leaves a small indentation, they’re perfectly proofed.
If your kitchen is cool, create a warm environment. Place the donuts in an oven that’s turned off but has the light on. The gentle heat from the light bulb creates the perfect proofing temperature. Be patient with this step – under-proofed donuts will be dense, while over-proofed ones might collapse during frying.
Frying the Raised Yeast Donuts
While your donuts are rising, prepare your frying station. Fill a heavy-bottomed pot or Dutch oven with about 2-3 inches of neutral oil like canola or vegetable oil. Heat the oil to 350°F (175°C), using a candy or deep-fry thermometer for accuracy. Temperature control is essential – too hot and your donuts will burn before cooking through, too cool and they’ll absorb excess oil.
Carefully lower 2-3 donuts into the hot oil using a slotted spoon or spider strainer. Don’t overcrowd the pot, as this will lower the oil temperature. Fry for about 1-2 minutes per side until they’re golden brown. The donuts should flip themselves when the first side is done, but you can help them along with your slotted spoon.
Once fried to perfection, transfer the donuts to a cooling rack lined with paper towels to drain excess oil. Let them cool slightly before glazing or coating with your favorite toppings. The step by step process might seem lengthy, but the results are well worth the effort – homemade donuts with a professional-quality taste and texture that will impress everyone!

Tips for Frying Perfect Homemade Donuts
Frying donuts to get that golden-brown outside and fluffy inside is all about understanding a few key principles. It might seem tough at first, but with the right approach, you’ll soon be frying like a pro.
Safety First: Handling Hot Oil
Hot oil can burn you badly, so always be careful. Never leave the oil unattended and have a metal lid ready to cover the pot if flames happen. Use a heavy-bottomed pot to keep the heat in and prevent spills.
Keep kids and pets away from the area, and make sure your workspace is clear. Having a clean and spacious area makes frying safer and less stressful.
The Perfect Temperature
The right oil temperature is key for frying donuts. If it’s too cool, your donuts will soak up too much oil and become greasy. If it’s too hot, they’ll brown too fast on the outside but stay raw inside.
A candy or deep-fry thermometer is essential for checking the oil’s temperature. Don’t rely on your eyes alone! The temperature will drop when you add donuts, so let it recover between batches.
Pro tip: If you don’t have a thermometer, test the oil by dropping a small piece of dough into it. It should bubble moderately and rise to the surface quickly. If it browns too fast or stays at the bottom, the oil isn’t ready.
Essential Tools for Success
Having the right tools makes frying donuts easier and safer. A slotted spoon or spider strainer is great for gently adding and removing donuts. Have plenty of paper towels or baking sheets ready to soak up excess oil.
Using a timer is better than guessing. Most donuts need 1-1.5 minutes per side, depending on size and oil temperature. This ensures consistency in your batch.
The Frying Process
When your oil is at 350-370°F, start frying. Gently add donuts to the oil with your slotted spoon, being careful not to splash. Fry only 2-3 donuts at a time, depending on your pot size.
Your donuts should be about 1/2 inch thick for the best frying. Thicker donuts might not cook through, while thinner ones can get too crispy. After 1-1.5 minutes, when the bottom is golden, flip them over.
Once both sides are golden, take them out of the oil and place them on paper towels or baking sheets. Let them cool a bit before glazing or coating.
Choosing the Right Oil
Not all oils are good for frying donuts. You want an oil with a neutral flavor and a high smoke point. Here’s a comparison of common options:
| Oil Type | Smoke Point | Flavor Impact | Cost | Best For |
|---|---|---|---|---|
| Vegetable Oil | 400-450°F | Very Neutral | Low | All-purpose donut frying |
| Canola Oil | 400°F | Neutral | Low | Health-conscious bakers |
| Peanut Oil | 450°F | Slightly Nutty | Medium | Professional-style donuts |
| Shortening | 360-410°F | Very Neutral | Medium | Traditional cake donuts |
Troubleshooting Common Issues
Even experienced bakers face problems sometimes. Here are solutions to common donut frying challenges:
Donuts too dark: Your oil is likely too hot. Lower the temperature and monitor with your thermometer.
Donuts too pale: The oil temperature is too low. Increase the heat and wait until it reaches the right range before continuing.
Greasy donuts: Either your oil wasn’t hot enough or you didn’t drain them well. Use plenty of paper towels and drain them properly.
Raw centers: Your donuts might be too thick or you’re frying at too high a temperature. The outside browns before the inside cooks. Try making them slightly thinner or reducing your oil temperature.
Oil Disposal and Cleanup
After frying, let the oil cool completely. Never pour it down the drain! Instead, transfer it to a sealable container and dispose of it according to your local regulations. For smaller amounts, you can absorb it with paper towels and throw it in the trash.
Clean your pot and tools with hot, soapy water to remove all oil residue. A degreasing dish soap works best for this task.
With these tips, you’re ready to fry perfect donuts every time. Remember, practice makes perfect—your first batch might not be flawless, but each attempt will bring you closer to donut perfection!
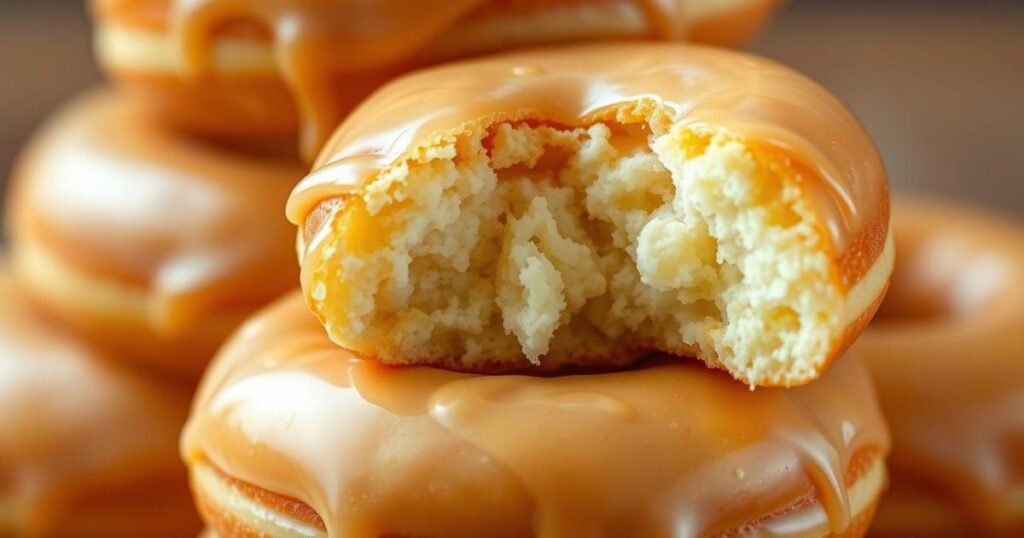
Glazing and Flavoring Your Soft Donuts
Adding the perfect glaze or topping to your freshly made donuts makes them irresistible. This is where you can let your creativity shine. Whether you prefer a classic vanilla glaze or something adventurous, the finishing touches make your donuts special.
How to Make Glaze for Homemade Donuts
A perfect glaze should be sweet and smooth. It should cling to your donuts but be thin enough for a smooth coating. The basic vanilla glaze is a key part of many donut recipes and only needs three simple ingredients.
Here’s my foolproof basic glaze recipe for your homemade donuts:
- 2 cups powdered sugar, sifted to remove lumps
- 1/4 cup milk (whole milk works best)
- 1 teaspoon pure vanilla extract
To make the glaze, whisk the powdered sugar in a wide, shallow bowl until smooth. Add the vanilla extract, then gradually whisk in the milk until you reach your desired consistency. For a thicker glaze, use less milk. For a thinner glaze, add more.
The temperature of your donuts matters when glazing. For the best results, dip your donuts while they’re warm (but not hot) from frying. This helps the glaze adhere better and creates that classic glazed donut look.
When dipping your donuts, use a gentle touch. Dip the top half of each donut into the glaze, then lift it straight up and give it a slight twist as you remove it. Let the excess glaze drip back into the bowl for a few seconds before placing the donut on a wire rack. This prevents puddles of glaze from forming around your donuts.
If your glaze becomes too thick as you work, simply whisk in a few drops of milk to thin it out. If it’s too thin, add a tablespoon of powdered sugar at a time until you reach the right consistency.
Alternative Toppings and Flavors
While a classic vanilla glaze is delicious, exploring different donut flavors and donut toppings can turn your homemade treats into something extraordinary. Here are some exciting alternatives to try:
- Chocolate glaze: Replace 1/4 cup of powdered sugar with cocoa powder in the basic glaze recipe, or melt 1/2 cup chocolate chips with 2 tablespoons butter and 1 tablespoon corn syrup for a richer option.
- Maple glaze: Substitute maple syrup for the vanilla extract and use 1-2 tablespoons less milk in the basic recipe.
- Fruit glazes: Add 2 tablespoons of fruit puree (strawberry, blueberry, or lemon) to the basic glaze for natural color and flavor.
- Cinnamon sugar coating: Skip the glaze entirely and toss warm donuts in a mixture of 1 cup granulated sugar and 1-2 tablespoons ground cinnamon.
Beyond glazes, consider these additional donut toppings to add texture and visual appeal:
- Colorful sprinkles (add while the glaze is wet)
- Toasted coconut flakes
- Crushed nuts like pecans, walnuts, or pistachios
- Drizzles of caramel or peanut butter
You can also infuse flavor directly into your donut dough. Try adding 1-2 teaspoons of spices like cinnamon, nutmeg, or cardamom to the dry ingredients. Citrus zest (orange, lemon, or lime) adds brightness, while extracts like almond or coconut offer aromatic alternatives to vanilla.
For seasonal variations, consider these winning combinations:
- Fall: Apple cider donuts with cinnamon sugar coating or maple glaze with chopped pecans
- Winter: Chocolate glazed donuts with crushed peppermint or gingerbread spiced donuts with vanilla glaze
- Spring: Lemon glazed donuts with poppy seeds or strawberry glazed donuts with fresh berries
- Summer: Coconut glazed donuts with toasted coconut or blueberry glazed donuts with lemon zest
Whether you’re making a fried donut recipe or a baked donuts recipe, these glazes and toppings work beautifully for both. Baked donuts may absorb glazes differently than fried ones, so you might want to dip them twice for a more pronounced coating.
Remember that glazed donuts are best enjoyed fresh, ideally within 24 hours of making them. The joy of creating your own glazed donuts recipe at home is that you can make small batches and enjoy them at their absolute best!
Storing and Freezing Homemade Donuts
Homemade donuts are best when fresh, but you can keep them tasty for days or months. Knowing how to store them is key. This way, you can enjoy them longer than just that first bite.
Room Temperature Storage
For most donuts, keeping them at room temperature is best for a short time. Put cooled donuts in an airtight container with paper towels to soak up moisture. This works well for glazed and unglazed donuts.
Donuts made with yeast stay fresh for 1-2 days at room temperature. They dry out faster than cake donuts, so eat them sooner.
Cake donuts, without yeast, last up to 2 days at room temperature. Their denser texture helps them stay fresh longer.
When glazing, decide based on how soon you’ll eat them. Glaze immediately for up to 24 hours. For longer storage, glaze just before serving to avoid stickiness.
Chocolate glaze or frosting donuts last longer than those with powdered sugar. Donuts with more surface area, like ring shapes, dry out faster.
Freezing Donuts for Long-Term Storage
Freezing is the best way to enjoy donuts weeks later. Frozen donuts stay good for 2-3 months, but they won’t be as fresh.
Freeze donuts individually for the best results. Cool them completely, then freeze on parchment paper for 3-4 hours. This prevents them from sticking together.
Wrap each donut in plastic wrap, then in a container or bag. This keeps them from getting freezer burn. Label the container with the date.
To thaw, let frozen donuts thaw at room temperature for 1-2 hours. For a warm treat, warm them in a 350°F oven for 3 minutes.
Freezing can change the texture of donuts made with a stand mixer. Yeast donuts freeze better than cake donuts, but both can be frozen successfully.
Don’t waste day-old donuts! Turn them into bread pudding or a donut trifle. These ideas give your donuts a new life.
Remember, homemade donuts are best fresh. But with the right storage, you can enjoy them for longer. Enjoying them fresh from the fryer or oven is the best, though!
Conclusion:
Making your own donuts from scratch is a special experience. Working with donut dough, from mixing yeast with warm water to watching it rise, creates treats that can’t be beat by store-bought ones.
The perfect donut comes from a few key techniques. Keep your oil at the right temperature and handle your dough gently after it rises. Don’t rush the proofing process. These steps are key to getting that classic light texture.
Your kitchen will fill with a delicious aroma as these golden rings fry to perfection. After cooling slightly, a dip in glaze or melted butter followed by your favorite toppings makes them special. Try different shapes, like classic rings, filled balls, or twists.
This easy doughnut recipe is great for weekend breakfasts, holiday mornings, or any time you want to make something special. Arrange your finished donuts on baking sheets lined with parchment for a stunning display that everyone will love.
Don’t worry if your first batch isn’t perfect – even imperfect homemade donuts taste amazing! The joy of biting into a warm, fresh donut you made yourself is worth every minute in the kitchen. So, gather your ingredients, set aside some time, and enjoy the simple pleasure of homemade donuts.
FAQ – Donuts
Can I make donuts without a deep fryer?
Yes, you can make delicious homemade donuts without a deep fryer. Use a heavy-bottomed pot or Dutch oven. Fill it with 2-3 inches of oil and use a candy thermometer to keep the temperature right. Aim for 350°F to 375°F for the perfect donut.
What’s the difference between baked donuts and fried donuts?
Fried donuts have a crispy outside and a soft inside. Baked donuts are denser and taste like cake. Fried donuts are classic, but baked ones are healthier and easier to make.
Why didn’t my donuts rise properly?
Several things can stop donuts from rising. Old or inactive yeast is a big problem. Make sure your environment is warm enough for yeast to work. Don’t overwork the dough, and let it proof long enough. The dough should spring back when poked.
Can I make the donut dough ahead of time?
Yes, you can make the dough ahead and refrigerate it overnight. This makes the dough taste better. Let it come to room temperature before shaping and frying.
Why are my donuts greasy or oily?
Greasy donuts happen when the oil is too cold. Use a thermometer to keep the oil at 350°F to 375°F. Donuts will absorb oil if the oil is too low. Drain them on paper towels to get rid of excess oil.
What’s the best oil for frying donuts?
Use oils like vegetable, canola, or peanut oil for frying. They have a neutral taste and can handle high heat. Avoid olive oil or butter because they burn easily and taste strong.
Can I make donuts without yeast?
Yes, you can make cake donuts without yeast. They are denser and quicker to make. They’re great when you don’t have time to wait for yeast to rise.
How do I know when my donuts are fully cooked?
Donuts are done when they’re golden brown and fluffy inside. Look for a light ring around the middle. If unsure, cut one open to check the inside. They usually take 1-2 minutes per side at 350-375°F.
Why did my glaze become too runny or too thick?
The glaze’s consistency depends on sugar and liquid ratios. Add powdered sugar for a thicker glaze or liquid for a thinner one. Warm donuts will make the glaze thinner, so aim for a bit thicker.
Can I freeze the shaped, uncooked donut dough?
Yes, you can freeze the dough for up to a month. Freeze the shaped donuts, then thaw and fry them. They might not rise as much as fresh dough.
What can I do with leftover donut holes?
Donut holes are great! Fry them and toss in cinnamon sugar or glaze. They’re perfect for parties or as a sweet treat. Don’t throw away that dough from the centers!
Homemade Donuts Recipe
Ingredients
- Donut Dough Ingredients
- 3½ cups of all-purpose flour
- ½ cup of bread flour
- 2¼ teaspoons of active dry yeast
- ¼ cup of warm water
- ⅓ cup of granulated sugar
- 2 large eggs
- 1 egg yolk room temperature
- ¾ cup of warm milk
- 4 tablespoons of melted butter
- 1 teaspoon of vanilla extract
- 1 teaspoon of salt
- Optional Substitutes:
- Almond or oat milk
- Plant-based butter
- Commercial egg replacer
- Glaze Ingredients
- 2 cups of powdered sugar sifted
- ¼ cup of milk or water
- 1 teaspoon of vanilla extract
- Variations:
- For chocolate glaze: 3 tablespoons of cocoa powder + 1 extra tablespoon milk
- For maple glaze: maple extract and syrup
- For fruit glazes: 1-2 tablespoons of fruit puree or jam
Instructions
- Preparing the Dough
- Mix warm milk, sugar, and yeast. Let sit 5-10 minutes until foamy.
- Add eggs, melted butter, vanilla, and salt. Mix well.
- Slowly mix in flour. Dough pulls from bowl sides when ready.
- Knead on floured surface 5-7 minutes until smooth and elastic.
- Perform window pane test to check readiness.
- Dividing and Shaping the Dough
- Place dough in greased bowl, cover, and let rise 1 hour.
- Punch down dough and roll out to ½-inch thick.
- Cut with 3-inch and 1-inch cutters (or use glasses/caps).
- Shape into balls for filled donuts if desired.
- Proofing the Donuts
- Place donuts on parchment-lined sheets with space in between.
- Cover loosely and let rise 30–45 minutes in warm place.
- Use oven light or warm environment for proofing.
- Check readiness with finger indentation test.
- Frying the Donuts
- Heat 2-3 inches of oil to 350°F in heavy pot.
- Fry 2–3 donuts at a time, 1–2 minutes per side.
- Let drain on paper towels over cooling rack.
- Glazing
- Dip warm donuts in glaze, top side only.
- Twist gently, let excess drip off, place on wire rack.
Notes
- Use a thermometer to maintain proper oil temperature.
- If dough doesn’t foam, start with new yeast.
- Donuts should puff during proofing for the best texture.
- Use a slotted spoon or spider strainer for safe frying.
- Donuts are best fresh, but can be stored at room temp for 1–2 days.
- Freeze individually wrapped donuts for up to 2–3 months.
- Reheat in oven at 350°F for 3 minutes for best results.
- Add flavor to the dough with spices, zest, or extracts for variations.
- Glazed donuts are best enjoyed within 24 hours.