


Did you know one cream cheese filling can change up to 8 desserts? This amazing filling is about to change your baking game. With just five simple ingredients, I’ll show you how to make a versatile cheesecake filling. It’s perfect for pastries, cakes, and more.
This recipe is for home bakers who want top-notch results easily. It’s great for cupcakes, donuts, or coffee cake. The secret is using fresh ingredients and the right mixing.
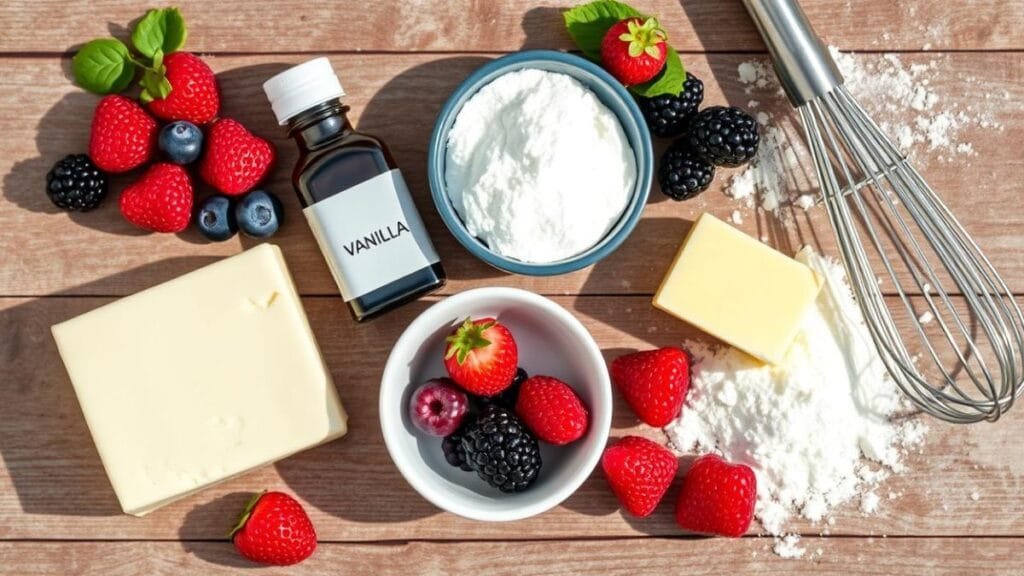
The beauty of this recipe is how simple it is. You need an 8 oz cream cheese, 1/3 cup icing sugar, a teaspoon vanilla, and 1/2 cup whipping cream. These ingredients mix up in minutes to make any dessert special.
This cream cheese filling is more than a recipe—it’s a blank canvas for your creativity. Use it for cake toppings or pastry fillings. Each serving is a chance to try something new and delicious.
- Why This Cream Cheese Filling Is a Game-Changer
- Essential Ingredients and Equipment Needed
- How to Make the Perfect Cream Cheese Filling
- Versatile Uses for Your Cream Cheese Filling
- Tips for Achieving the Perfect Consistency
- Creative Flavor Variations and Add-ins
- Professional Piping and Decoration Techniques
- Conclusion
Why This Cream Cheese Filling Is a Game-Changer
I’ve found a versatile filling that makes ordinary desserts into amazing treats. This cream cheese filling is more than just a recipe. It’s a kitchen game-changer that makes baking easier and desserts better.
This filling is incredibly adaptable. It works for both no-bake and baked desserts. It’s a tasty base for many sweet creations.
Perfect for Multiple Dessert Applications
This filling is great for many desserts. Here are some ways to use it:
- Filling for cupcakes and muffins
- Topping for bagel toppings
- Layer in trifles and pastries
Time-Saving Benefits
Busy bakers will love how fast this filling is to make. With just four ingredients, you can make enough for many desserts in under 10 minutes.
| Ingredient | Quantity |
|---|---|
| Cream Cheese | 8 ounces |
| Powdered Sugar | 1 pound |
| Butter | 1/2 cup |
| Vanilla Extract | 1 teaspoon |
Cost-Effective Solution
This filling uses affordable, easy-to-find ingredients. It’s a budget-friendly way to make desserts that taste like they’re from a restaurant. One batch can cover 24 cupcakes or two 9-inch cakes, making it a great deal for both home bakers and professionals.
Essential Ingredients and Equipment Needed
To make the perfect cream cheese filling, you need the right ingredients and tools. I’ll show you what you need to make a delicious cream cheese filling. It will take your desserts to the next level.
Key Ingredients
- Cream cheese (16 ounces, softened)
- Confectioners sugar (2 1/2 cups)
- Granulated sugar (1 cup)
- Vanilla extract (2 teaspoons)
- Egg yolk (1 large)
- Milk (1/4 cup)
Essential Equipment
- Large mixing bowl
- Electric mixer (hand-held or stand mixer)
- Measuring cups and spoons
- Rubber spatula
- Mixing whisk
For the best cream cheese, use full-fat, brick-style at room temperature. It blends smoothly and gives your dessert a great texture.
| Ingredient | Quantity | Purpose |
|---|---|---|
| Cream Cheese | 16 ounces | Base of filling |
| Confectioners Sugar | 2 1/2 cups | Sweetness and smooth texture |
| Vanilla Extract | 2 teaspoons | Flavor enhancement |
Pro tip: Make sure your ingredients are at room temperature before you start. It makes the cream cheese filling smooth and easy to spread and pipe.
How to Make the Perfect Cream Cheese Filling
Making a tasty cream cheese filling is simpler than you think. I’ll show you how to make a smooth, creamy filling. This will take your desserts to the next level. Whether you want to jump to the recipe or learn the techniques, this guide has everything you need.
Softening and Mixing Techniques
The first step to a perfect filling is proper preparation. Let your cream cheese sit at room temperature for about 30 minutes before starting. This makes it smooth when you mix it at medium speed.
- Remove cream cheese from refrigerator 30 minutes before mixing
- Use a hand mixer with beaters for best results
- Beat ingredients until smooth and creamy
Temperature Control Tips
Temperature is key for the right filling consistency. Make sure all ingredients are at room temperature for a uniform mix.
| Ingredient | Recommended Temperature | Mixing Time |
|---|---|---|
| Cream Cheese | Room Temperature | 2-3 minutes |
| Heavy Cream | Chilled | Until soft peaks form |
| Powdered Sugar | Room Temperature | Gradually add |
Storage Guidelines
Proper storage keeps your cream cheese filling fresh and tasty. Store it in an airtight container in the fridge. It stays good for up to 5 days, ideal for preparing desserts ahead of time.
- Use an airtight container
- Refrigerate immediately after preparation
- Consume within 5 days
- Stir before use if separation occurs
Versatile Uses for Your Cream Cheese Filling
My cream cheese filling is a culinary powerhouse. It turns ordinary desserts into extraordinary ones. This versatile recipe opens up a world of delicious possibilities in your kitchen.
- Layer between cake layers for a rich, creamy texture
- Pipe into cupcakes for a surprise filling
- Spread inside puff pastry before baking
- Use as a decadent topping for fresh fruits
- Create delightful trifle layers
Pastry fillings become incredibly simple with this recipe. Cut rectangular puff pastry shapes. Pipe the cream cheese filling in the center. Add fresh berries before baking at 390°F for about 15 minutes.
The result is a golden, flaky pastry with a creamy, tangy center. It will impress even the most discerning dessert lovers.
Your cream cheese filling isn’t limited to sweet treats. It can elevate savory dishes too! Try spreading it on scones, mixing into scrambled eggs, or using as a base for dips. The high fat content ensures a silky smooth texture that enhances both sweet and savory recipes.
Pro tip: Always use fresh cream cheese and consume within two weeks of opening for the best flavor and texture. With this versatile filling, your culinary creativity knows no bounds!

Tips for Achieving the Perfect Consistency
Making a delicious filling needs precision and knowing how cream cheese works. The right methods can turn your dessert from good to amazing. This is true, even with heavy cream and cream cheese.
Getting the perfect texture is key for a tasty cream cheese filling. Professional bakers say that texture can make or break a dessert.
Common Texture Challenges
- Runny filling
- Lumpy texture
- Grainy appearance
- Over-sweetened mixture
Strategic Troubleshooting Solutions
Here are some practical ways to fix common cream cheese filling problems:
- Chill the filling for 30-60 minutes if too soft
- Use gelatin as a stabilizing agent in warm conditions
- Whip cream cheese for 2-3 minutes maximum
- Sift powdered sugar to prevent lumps
| Problem | Solution | Time Required |
|---|---|---|
| Runny Filling | Refrigerate | 30-60 minutes |
| Lumpy Texture | Use room temperature ingredients | 15 minutes |
| Overly Sweet | Add lemon juice | Immediate |
By learning these techniques, you’ll make a filling that’s always delicious. Remember, the more you practice with heavy cream and cream cheese, the better you’ll get.
Creative Flavor Variations and Add-ins
Want to make your cream cheese filling stand out? It’s simpler than you think. Just add a few creative ingredients to turn it into a masterpiece that will impress everyone.
Vanilla extract is key to making your cream cheese filling amazing. Here are my top picks for adding flavor:
- Citrus Burst: Add 1-2 tablespoons of lemon or orange zest for a bright, tangy twist
- Chocolate Lover’s Dream: Fold in mini chocolate chips or swirl in Nutella
- Coffee Kick: Mix in 1/2 teaspoon of espresso powder for a rich, deep flavor
- Fruit Fusion: Top your sweet fillings with fresh berries or chopped peaches
Try different extracts to change up your cream cheese filling. Swap vanilla for almond or coconut for new tastes. Dulce de leche or Biscoff spread can also add a rich, unique flavor.
Remember, make sure your add-ins are at room temperature and mixed well. This keeps your filling smooth and consistent.
| Flavor Variation | Key Ingredient |
|---|---|
| Tropical Twist | Coconut extract |
| Chocolate Delight | Chocolate chips |
| Caramel Dream | Dulce de leche |
Professional Piping and Decoration Techniques
Learning to pipe cream cheese frosting can make your desserts stand out. With the right skills, you’ll make desserts that look as good as they taste.
Basic Piping Patterns
I’ll show you key piping techniques for your cheese filling and frosting. Start with these basic methods:
- Use a large round tip for smooth borders and clean lines
- Select a star tip (#14 or #16) for decorative swirls
- Create a 1-inch frosting rim around cake perimeters
- Pipe filling directly into cupcake centers
Advanced Decorating Methods
Once you’ve got the basics down, try more advanced decoration techniques for your frosting:
- Create ombre effects by blending different frosting colors
- Use multiple piping tips for detailed designs
- Enhance presentations with fresh fruit or chocolate shavings
- Experiment with rosette and swirl patterns
Pro tip: Make sure your frosting is at room temperature for the best piping. This temperature gives you smooth, elegant decorations.

Conclusion
I’ve found that making the perfect cream cheese filling is a big deal for desserts. It turns simple treats into amazing dishes. You can use it in crepes or cheesecakes, and the possibilities are endless.
Learning about cream cheese filling has shown me that quality is key. Using full-fat cream cheese gives the best texture, perfect for both light pastries and thick desserts. Plus, you can make it up to two days ahead, which is a big help for bakers.
Whether you bake at home or dream of being a pastry chef, mastering this filling is a big step. Try adding different flavors, like vanilla or Nutella, to your creations. The main thing is to know the basics and let your creativity run wild.
Once you start using this versatile cream cheese filling, your desserts will get a lot better. With a few easy steps, you can make your baking stand out. Your desserts will impress and make everyone happy.
FAQ
How long can I store the cream cheese filling?
Store the cream cheese filling in an airtight container in the fridge for 4-5 days. Keep it chilled to keep it fresh and prevent bacteria.
Can I freeze this cream cheese filling?
Yes, freeze it for 2-3 weeks. Thaw it in the fridge overnight. Then, whisk it to make it smooth again.
What if my cream cheese filling is too runny?
If it’s too runny, chill it for 30-60 minutes. Or, whip heavy cream and fold it in for a firmer texture.
Can I use low-fat cream cheese for this recipe?
You can, but full-fat cream cheese gives better flavor and texture. Low-fat might make the filling less creamy.
How can I fix a grainy cream cheese filling?
Make sure all ingredients are room temperature before mixing. Sift the sugar and avoid overmixing. If it’s grainy, beat it with a hand mixer until smooth.
Are there dairy-free alternatives for this filling?
Yes, use vegan cream cheese alternatives made from cashews or other plant-based ingredients. Choose one with a similar consistency to traditional cream cheese.
Can I make this filling ahead of time?
Absolutely! Prepare it 3-4 days in advance and store it in the fridge. Stir it well before using.
What are some creative ways to use this filling?
It’s very versatile. Use it in cakes, cupcakes, pastries, danishes, trifles, or as a topping for pancakes or bagels. Try different uses!
How can I add more flavor to the basic filling?
Add lemon zest, espresso powder, Nutella, dulce de leche, or different extracts like almond or coconut. You can also add chocolate chips or fruit for more flavor.
What piping tips work best for this filling?
Use a large round or star tip for basic piping. For cupcakes, try a #14 or #16 star tip. Get creative with multiple tips for ombre effects or designs.


